VxWorks Getting Started
Get VxWorks running in QEMU, a machine emulator.
Notes
- These instructions were executed on a Linux machine, version
Ubuntu 24.04.4 LTS (Noble Numbat). - Lines starting with
>represent commands entered at the command prompt. - Instructions were taken from official references listed below.
Official VxWorks Links
Prerequisites
Before proceeding with these instructions, ensure the following packages are installed.
sudo apt install build-essential libc6:i386
sudo apt install python3-pip
sudo apt install python3-pyftpdlib
sudo apt install qemu-system-x86
Download SDK and Boot VxWorks Image
Download
VxWorks SDK for IA - QEMU (x86-64).Extract the compressed file. This may take a couple minutes.
# x = extract
# j = use bzip2 compression
# f = filename follows
tar -xjf wrsdk-vxworks7-qemu-1.17.0.tar.bz2
If preferred, move the extracted directory.
# Make new directory
> mkdir ~/apps/wind-river

# Move extracted directory to new location
> mv wrsdk-vxworks7-qemu-1.17.0 ~/apps/wind-river
Navigate to the extracted directory and source
sdkenv.sh.> cd ~/apps/wind-river/wrsdk-vxworks7-qemu-1.17.0 > source sdkenv.shNote: If you get this error after sourcing the file, reconfigure
/bin/sh/to bash as described at the end of this page.The default shell is dash, please change your default shell to bash.Verify that the environment
$WIND_HOMEhas been set.> echo $WIND_HOME /home/flux/apps/wind-river/wrsdk-vxworks7-qemu-1.17.0Boot VxWorks on QEMU. From the VxWorks SDK root, run the following command (in this example the SDK root is:
~/apps/wind-river/wrsdk-vxworks7-qemu-1.17.0).> qemu-system-x86_64 -m 1024M -kernel vxsdk/bsps/itl_generic_3_0_0_5/vxWorks \ -net nic -net user,hostfwd=tcp::1534-:1534,hostfwd=tcp::2345-:2345 \ -display none -serial stdio -monitor none \ -append "bootline:fs(0,0)host:vxWorks h=10.0.2.2 e=10.0.2.15 u=target pw=vxTarget o=gei0"Instantiating /ram0 as rawFs, device = 0x1 Instantiating /ram0 as rawFs, device = 0x1 Formatting /ram0 for HRFS v1.2 Formatting...OK. Target Name: vxTarget Instantiating /tmp as rawFs, device = 0x10001 Instantiating /tmp as rawFs, device = 0x10001 Formatting /tmp for HRFS v1.2 Formatting...OK. _________ _________ \........\ /......../ \........\ /......../ \........\ /......../ \........\ /......../ \........\ \......./ \........\ \...../ VxWorks SMP 64-bit \........\ \.../ \........\ \./ Release version: 26.03 \........\ - Build date: May 6 2026 15:25:23 \........\ \......./ Copyright Wind River Systems, Inc. \...../ - 1984-2026 \.../ /.\ \./ /...\ - ------- Board: x86_64 Processor (ACPI_BOOT_OP) SMP/SMT CPU Count: 1 OS Memory Size: ~958MB ED&R Policy Mode: Deployed Debug Agent: Started (always) Stop Mode Agent: Not started Instantiating /ram as rawFs, device = 0x20001 Formatting /ram for DOSFS Instantiating /ram as rawFs, device = 0x20001 Formatting...Retrieved old volume params with %38 confidence: Volume Parameters: FAT type: FAT32, sectors per cluster 0 0 FAT copies, 0 clusters, 0 sectors per FAT Sectors reserved 0, hidden 0, FAT sectors 0 Root dir entries 0, sysId (null) , serial number 110000 Label:" " ... Disk with 64 sectors of 512 bytes will be formatted with: Volume Parameters: FAT type: FAT12, sectors per cluster 1 2 FAT copies, 54 clusters, 1 sectors per FAT Sectors reserved 1, hidden 0, FAT sectors 2 Root dir entries 112, sysId VXDOS12 , serial number 110000 Label:" " ... OK. Adding 28098 symbols for standalone. ->
Notes
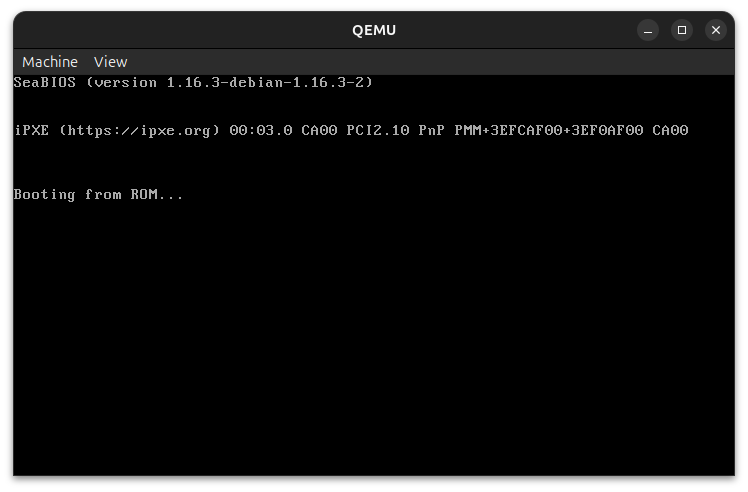
If the VxWorks image did not load, a terminal window will pop up and might look like this:
If you click on the QEMU terminal, you might not be able to click anywhere on your machine. press
Ctrl+Alt+Gto release the grab.The backspace key might not work from the VxWorks terminal. To use backspace, press
Ctrl+H.
Hello World RTP
Create a ‘hello world’ source file named
hello.c.#include <stdio.h> int main(void) { printf("\nHello there :)\n\n"); return 0; }Source the
sdkenv.shscript from the root of the SDK.> cd ~/apps/wind-river/wrsdk-vxworks7-qemu-1.17.0 > source sdkenv.shCompile the source file.
> wr-cc -rtp hello.c -static -o hello.vxeStart an FTP server.
> sudo python3 -m pyftpdlib -p 21 -u target -P vxTarget -d $HOME [I 2026-05-16 19:58:35] concurrency model: async [I 2026-05-16 19:58:35] masquerade (NAT) address: None [I 2026-05-16 19:58:35] passive ports: None [I 2026-05-16 19:58:35] >>> starting FTP server on 0.0.0.0:21, pid=406255 <<<To turn off FTP logging, append the command with
> /dev/null 2>&1> sudo python3 -m pyftpdlib -p 21 -u target -P vxTarget -d $HOME > /dev/null 2>&1Move the FTP server process to the background by pressing
Ctrl+Z. Runbgto keep the process running.^Z zsh: suspended sudo python3 -m pyftpdlib -p 21 -u target -P vxTarget -d $HOME > bg [3] continued sudo python3 -m pyftpdlib -p 21 -u target -P vxTarget -d $HOMEBoot VxWorks on QEMU as described above.
> qemu-system-x86_64 -m 1024M -kernel vxsdk/bsps/itl_generic_3_0_0_5/vxWorks \ -net nic -net user,hostfwd=tcp::1534-:1534,hostfwd=tcp::2345-:2345 \ -display none -serial stdio -monitor none \ -append "bootline:fs(0,0)host:vxWorks h=10.0.2.2 e=10.0.2.15 u=target pw=vxTarget o=gei0"Run
cmd.-> cmd [vxWorks *]# cd <path to hello.vxe>Example
Note: If logging was not redirected when starting the FTP server, FTP session messages may appear during command execution. These can be safely ignored.
-> cmd
[vxWorks *]# cd ~/git/sample-programs/vxworks/hello-vxworks
[I 2026-05-16 20:34:53] 127.0.0.1:42454-[] FTP session opened (connect)
[I 2026-05-16 20:34:53] 127.0.0.1:42454-[target] USER 'target' logged in.
[I 2026-05-16 20:34:53] 127.0.0.1:42454-[target] FTP session closed (disconnect).
[I 2026-05-16 20:34:53] 127.0.0.1:42458-[] FTP session opened (connect)
[I 2026-05-16 20:34:53] 127.0.0.1:42458-[target] USER 'target' logged in.
[I 2026-05-16 20:34:53] 127.0.0.1:42458-[target] FTP session closed (disconnect).
[I 2026-05-16 20:34:53] 127.0.0.1:42474-[] FTP session opened (connect)
[I 2026-05-16 20:34:53] 127.0.0.1:42474-[target] USER 'target' logged in.
[I 2026-05-16 20:34:53] 127.0.0.1:42474-[target] FTP session closed (disconnect).
[I 2026-05-16 20:34:53] 127.0.0.1:42478-[] FTP session opened (connect)
[I 2026-05-16 20:34:53] 127.0.0.1:42478-[target] USER 'target' logged in.
[I 2026-05-16 20:34:53] 127.0.0.1:42478-[target] FTP session closed (disconnect).

[vxWorks *]# hello.vxe
Launching process 'hello.vxe' ...
Process 'hello.vxe' (process Id = 0xffff800006ede000) launched.

Hello there :)
To shut down the VxWorks image, exit
cmdand then pressCtrl+C.[vxWorks *]# exit Au revoir! qemu-system-x86_64: terminating on signal 2
Hello World DKM
Using the same ‘hello world’ file from Hello World RTP, build as a DKM.
> wr-cc -dkm hello.c -o hello.outStart the FTP server, rerouting logging to a null file. The terminal will look like its hanging. Press
Ctrl+Zthenbgto keep the process running in the background.> sudo python3 -m pyftpdlib -p 21 -u target -P vxTarget -d $HOME > /dev/null 2>&1 ^Z zsh: suspended sudo python3 -m pyftpdlib -p 21 -u target -P vxTarget -d $HOME > /dev/null 2> > bg [1] + continued sudo python3 -m pyftpdlib -p 21 -u target -P vxTarget -d $HOME > /dev/null 2>Navigate to the root of the SDK, source the
sdkenv.shscript and boot QEMU.> cd ~/apps/wind-river/wrsdk-vxworks7-qemu-1.17.0 > source sdkenv.sh > qemu-system-x86_64 -m 1024M \ -kernel vxsdk/bsps/itl_generic_3_0_0_5/vxWorks \ -net nic \ -net user,hostfwd=tcp::1534-:1534,hostfwd=tcp::2345-:2345 \ -display none \ -monitor none \ -serial stdio \ -append "bootline:fs(0,0)host:vxWorks h=10.0.2.2 e=10.0.2.15 u=target pw=vxTarget o=gei0" ... _________ _________ \........\ /......../ \........\ /......../ \........\ /......../ \........\ /......../ \........\ \......./ \........\ \...../ VxWorks SMP 64-bit \........\ \.../ \........\ \./ Release version: 26.03 \........\ - Build date: May 6 2026 15:25:23 \........\ \......./ Copyright Wind River Systems, Inc. \...../ - 1984-2026 \.../ /.\ \./ /...\ - -------Use
ldto loadhello.outonto the system.-> ld < path/to/hello.out value = -140737372340224 = 0xffff800006ea4000 = _sysTableEnd + 0xffff800006a96000Run the main function.
-> main

Hello there :)

value = 0 = 0x0
Stop FTP Server Process
Determine the PID for the process.
> sudo lsof -i :21
COMMAND    PID USER   FD   TYPE   DEVICE SIZE/OFF NODE NAME
python3 406255 root    4u  IPv4 11734009      0t0  TCP *:ftp (LISTEN)
Kill the process, in this case,
406255.> sudo kill 406255
Reconfigure /bin/sh
The script sdkenv.sh assumes that /bin/sh is configured to bash, but in this example, it was configured to dash. This section describes how to reconfigure /bin/sh to bash.
Verify
/bin/shis pointing todash.> ls -la /bin/sh rwxrwxrwx 1 root root 4 Mar 31 2024 /bin/sh -> dashForce
/bin/shto link tobash.> sudo ln -sf /usr/bin/bash /bin/shVerify
/bin/shhas been reconfigured to/usr/bin/bash.> readlink -f /bin/sh /usr/bin/bash