Hello World With QNX
How to create and run minimal project on a virtual target.
This page describes how to run a minimal QNX project on a virtual target. The accompanying tutorial video demonstrates a similar workflow using a Raspberry Pi target.
Official QNX Resources
Tutorial Video
Documentation
Note
On this page, commands preceded by # indicate that the command is run in the terminal window of a running target.
Visual Studio Code: Create New Project
In VS Code, select QNX from the Activity Bar on the left side of the screen.

From the left sidebar under
QNX COMMANDSselectProjects > Create new Project....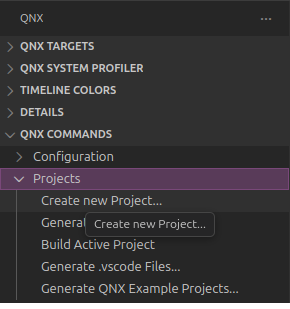
Type the name of your project, e.g.
hello_world.
Select
QNX Recursive Makefilefor the template.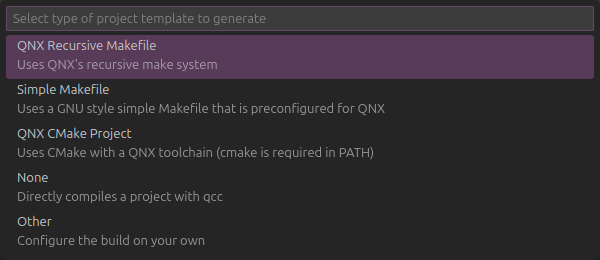
Select
cfor language.
Select
Executablefor build artifact.
A default
Hello Worldprogram is added tohello_world.c#include <stdio.h> int main() { printf("Hello QNX!\n"); return 0; }To compile, right-click on the project folder and go to
QNX > Build Active Project.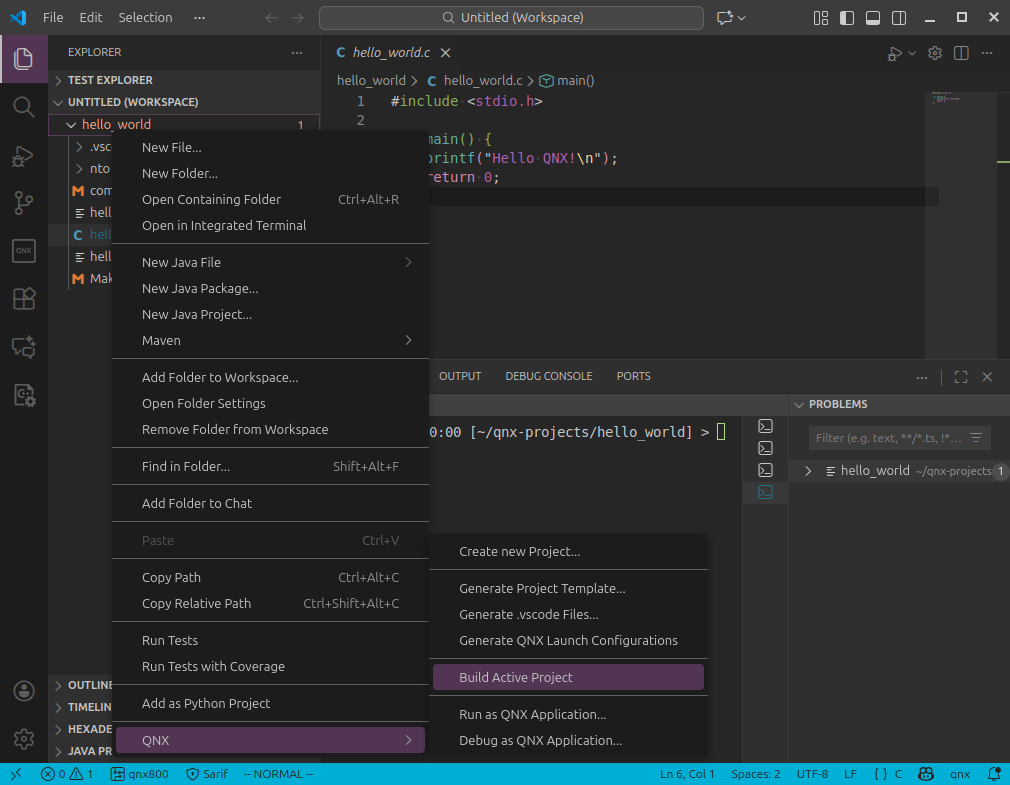
Example Terminal Output (From VS Code):
 *  Executing task in folder hello_world: make DEBUG=-g OPTIMIZE_TYPE=NONE

make  -Cnto -fMakefile
make[1]: Entering directory '/home/flux/qnx-projects/hello_world/nto'
make  -Caarch64 -fMakefile
make[2]: Entering directory '/home/flux/qnx-projects/hello_world/nto/aarch64'
make -j 1 -Co-le -fMakefile
make[3]: Entering directory '/home/flux/qnx-projects/hello_world/nto/aarch64/o-le'
make[3]: Nothing to be done for 'first'.
make[3]: Leaving directory '/home/flux/qnx-projects/hello_world/nto/aarch64/o-le'
make[2]: Leaving directory '/home/flux/qnx-projects/hello_world/nto/aarch64'
make  -Cx86_64 -fMakefile
make[2]: Entering directory '/home/flux/qnx-projects/hello_world/nto/x86_64'
make -j 1 -Co -fMakefile
make[3]: Entering directory '/home/flux/qnx-projects/hello_world/nto/x86_64/o'
make[3]: Nothing to be done for 'first'.
make[3]: Leaving directory '/home/flux/qnx-projects/hello_world/nto/x86_64/o'
make[2]: Leaving directory '/home/flux/qnx-projects/hello_world/nto/x86_64'
make[1]: Leaving directory '/home/flux/qnx-projects/hello_world/nto'
 *  Terminal will be reused by tasks, press any key to close it.
Note
The QNX Recursive Makefile template creates a structure that allows for compilation of different binaries for different architectures.
Visual Studio Code: Run Project
Create a virtual target through Visual Studio Code.
Verify that the target created is labeled as
defaultfrom theQNX TARGETSsection of the QNX sidebar.
Open
launch.jsonin<project-dir>/.vscodeand confirm that theqnxtargetproperty is set todefault.The default
launch.jsoncreated by VS Code should look similar to the following:{ "version": "2.0.0", "configurations": [ { "type" : "qnx-gdb", "request" : "launch", "name" : "QNX: hello_world", "gdb" : "gdb", "program" : "${command:qnx.autodetectBinary}", "remotePath" : "hello_world", //________________________________________________________ // Verify this value //________________________________________________________ "qnxtarget" : "default", //________________________________________________________ "upload" : true, "stopAtEntry" : true, "preLaunchTask" : "${defaultBuildTask}" } ] }Right-click on the project folder and go to
QNX > Run as QNX Application....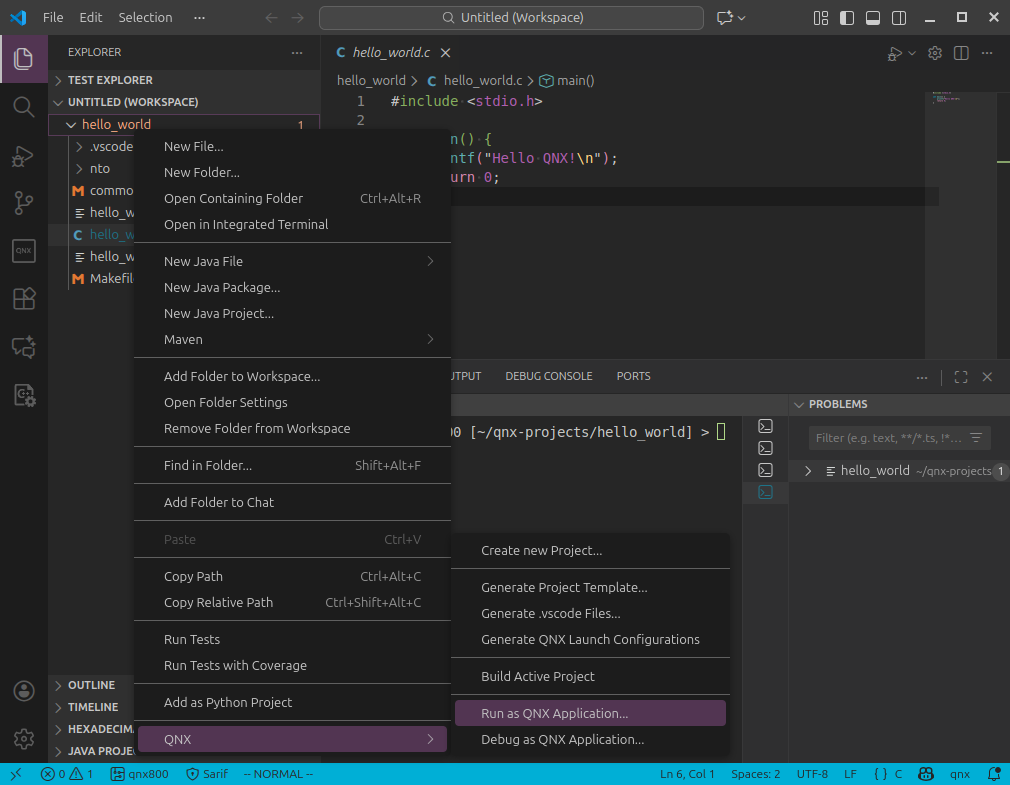
If everything is configured properly,
Hello QNXshould print to the debug console.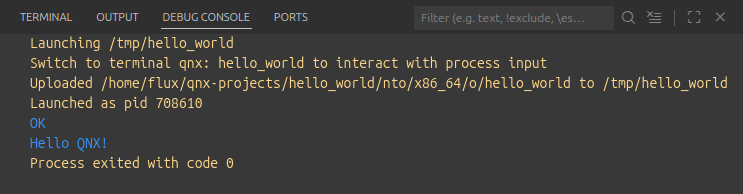
Errors When Running Application in Visual Studio Code
Error: getaddrinfor EBUSY
You may encounter this error if you do not have the arp command.
Error: Cannot launch, check Debug Console for failure message
Error: Cannot connect to qemu-qnx800-x86_64/-: Error: getaddrinfo EBUSY -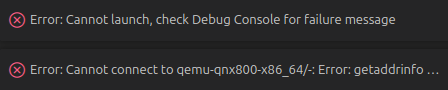
From the terminal panel, select the getip terminal tab. Notice if there is an error that says:
Cannot find arp command.
Solution: Install net-tools:
sudo apt install net-toolsCommand Line: Run Project
Set up a virtual target using
mkqnximage. Make sure to include the--ssh-identparameter.To run the virtual target in the terminal, from the directory where the target was created, execute this command:
Command (From Linux Host):
mkqnximage --runExample Output (From Running Target):
SeaBIOS (version 1.16.3-debian-1.16.3-2)
...
QNX noname 8.0.0 2025/07/30-19:24:08EDT x86pc x86_64
From the terminal of the running target, execute
ifconfigto determine its IP address. The address appears in thevtnet0section afterinet; in this example, it is192.168.122.146.Example Output (From Running Target):
# ifconfig
enc0: flags=0<> metric 0 mtu 1536
        groups: enc
        nd6 options=21<PERFORMNUD,AUTO_LINKLOCAL>
lo0: flags=8049<UP,LOOPBACK,RUNNING,MULTICAST> metric 0 mtu 16384
        options=680003<RXCSUM,TXCSUM,LINKSTATE,RXCSUM_IPV6,TXCSUM_IPV6>
        inet 127.0.0.1 netmask 0xff000000
        inet6 ::1 prefixlen 128
        inet6 fe80::1%lo0 prefixlen 64 scopeid 0x2
        groups: lo
        nd6 options=21<PERFORMNUD,AUTO_LINKLOCAL>
pflog0: flags=0<> metric 0 mtu 33144
        groups: pflog
pfsync0: flags=0<> metric 0 mtu 1500
        syncpeer: 0.0.0.0 maxupd: 128 defer: off
        syncok: 1
        groups: pfsync
vtnet0: flags=8863<UP,BROADCAST,RUNNING,SIMPLEX,MULTICAST> metric 0 mtu 1500
        options=4c07bb<RXCSUM,TXCSUM,VLAN_MTU,VLAN_HWTAGGING,JUMBO_MTU,VLAN_HWCSUM,TSO4,TSO6,LRO,VLAN_HWTSO,LINKSTATE,TXCSUM_IPV6>
        ether 52:54:00:75:e8:8f
        inet6 fe80::5054:ff:fe75:e88f%vtnet0 prefixlen 64 scopeid 0x5
        inet 192.168.122.146 netmask 0xffffff00 broadcast 192.168.122.255
        media: Ethernet autoselect (10Gbase-T <full-duplex>)
        status: active
        nd6 options=1<PERFORMNUD>
Open a new terminal window on the Linux host and navigate to the output executable of your project. It might be in the following location:
<project-dir>/nto/x86_64/oLocate the executable. If the project was build with VS Code, the executable usually has the same name as the project directory and has no file extension. In this case, it is named
hello_world.Example Commands (From Linux Host):
(linux host): cd ~/qnx-projects/hello_world/nto/x86_64/o # Navigate to output directory
(linux host): ls # List contents of directory
hello_world  hello_world.dep  hello_world.o  Makefile
From the Linux host, use
scp(secure copy) to copy the executable to the running target.Example Command (From Linux Host):
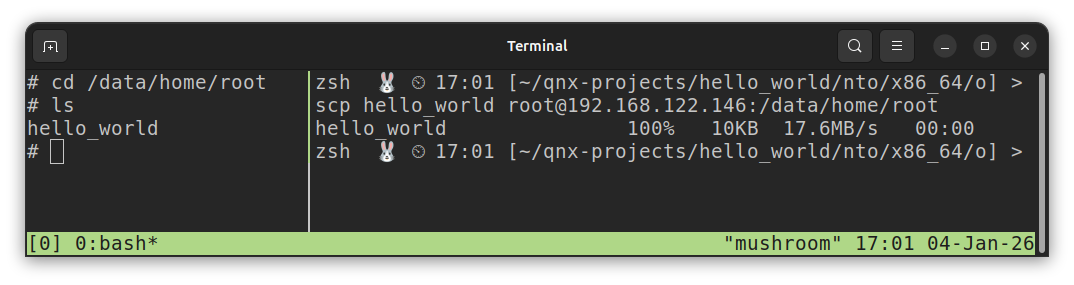
(linux host): scp hello_world root@192.168.122.146:/data/home/rootExample Output (From Linux Host):
hello_world 100% 10KB 21.8MB/s 00:00On the running target, navigate to
/data/home/rootand executels. You should see yourhello_worldexecutable.In this screenshot, the left pane is the running target, and the right pane is the Linux host computer.
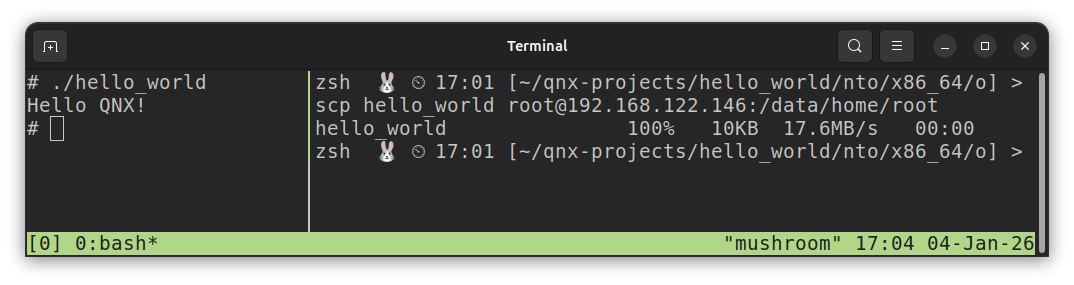
From the target terminal, run the executable.
Example Command (From Running Target):
./hello_worldExample Output (From Running Target):
Hello QNX!Screenshot:
Notes
Visual Studio Code Run: Executable Location
When running the program through VS Code, the executable is placed in the /tmp directory of the target.
To verify, connect to the target either through VS Code, or on the command line. Navigate to /tmp and list the directory contents.
Commands On Running Target:
# ls /tmpOutput On Running Target:
hello_world keep_files